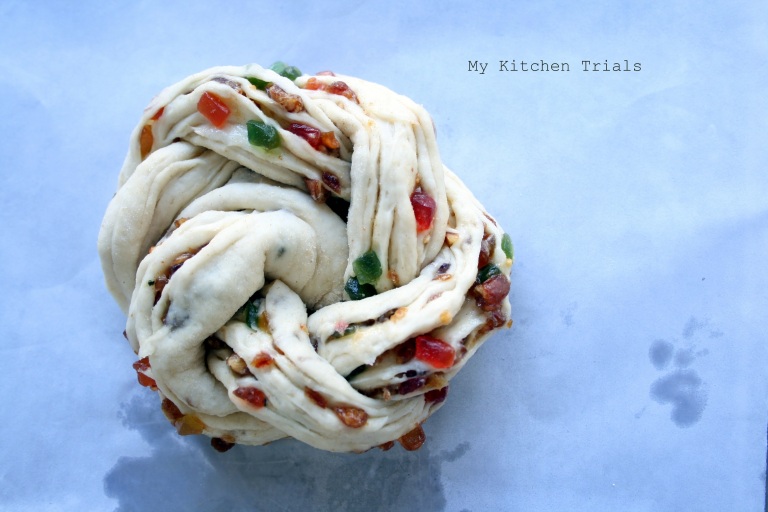
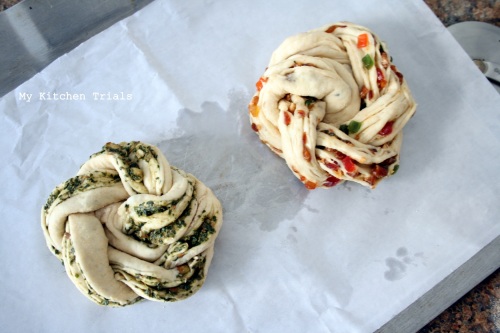
How many times have you shaped a russian rose and then left it unsupervised in the oven for baking? To top it, you go out for a walk, working up your appetite. You came back home really hungry and the smell of freshly baked bread seduces you and you end up gobbling half the bread. Then you remember about your poor blog and about taking pictures!!
Its happened to me once.
And since that happened, I don’t have an ‘after’ picture of this bread. I do have some clicks of half eaten bread, I will upload them later….as soon as I spot them.
This is my entry for Blogging Marathon 26, under ‘One Ingredient Three dishes’ theme. The chosen ingredient is AP flour and this entry is under bread.
Check out the Blogging Marathon page for what others are making for this edition.
Recipe idea : From my friend
Ingredients:
- Basic bread dough ( I set the yeast for proofing separately and then proceeded as it is mentioned)
- Butter – about 2-3 tbsp
- Filling of your choice – I used 2 small packets of tuttiftrutti and some mint pesto
Method:
- Proof the yeast, make a dough with flour, knead until elastic and let it rise until double in size.
- Punch it down and knead for a minute or two. I wanted two flavors, so I divided the dough into two.
- Prepare the filling – mix tuttifrutti with 2 tbsp butter so that it doesn’t fall off the bread. Keep the pesto ready.
Assembling (refer the pictures)
- In a lightly floured surface, roll out the dough into a as big a rectangle as you can, without tearing the dough. Spread the filling (pesto or tuttifrutti in my case) uniformly, leaving about a cm at the edges.
- From the longer side of the rectangle, tightly roll the dough (like a swiss roll). Be careful not to tear the dough.
- Using a sharp knife (or a pizza cutter), cut the roll along its length into two, keeping one end intact. Don’t cut through the entire roll so that you will have two pieces, cut through till you reach one end and leave that joint as such. You will kind of have an upside down ‘V’ shape.
- Twist the two halves together , again gently – taking care so that filling doesn’t fall off, keeping the filling side up.
- You now have a ‘rope like’ shape.
- Roll it into a circle with the filling side outside. For this, you can hold the ‘joint end’ with your left hand (that will be your centre of the rose), with your right hand take the loose end and just bring it around the centre once, so you will have a rose shape. Tuck the end neatly under the bread. Once you have shaped the rose, leave it to rise for 30 minutes.
- Bake in a preheated oven at 200 C for 15 – 20 minutes or till its done.
- The filling choices are endless.
Note: I learnt this from my friend and she had used sweetened coconut as filling that day. You can try sugar-cinnamon, sautéed onion-corn, pesto, coconut, nutella, thick coriander chutney – the possibilities are endless!
Check out youtube videos or step by step pictures online if you have any doubts on how to shape this bread.
I was not able to spot even a single decent picture of the finished bread, so this is all I have – unless I bake these again :D.


they look great. takes me many years back, when my younger brother used to make those. only we used to call it something else. he is now too old to make or bake. nostalgic.
LikeLike
you must be crowned the baking queen of BM now :-) Keep them going, and do post step by step pics of such a complicated process (to ignoramuses like me :D )… I love the shape its got…and the fillings are so…..out of the world !
LikeLike
At leas tyou had the foresight to take the “before” pictures. How about if you forget that too, then the post will “my camera/ laptop broke down — will post the pictures as soon as I get it fixed”.. Happened to me (too embarrassed to tell the truth).
Rose bread sounds awesome. Love the fillings.
LikeLike
They look so beautifully shaped. Would love to see the end product soon :) Such a basic recipe and so many options for shaping them :)
LikeLike
At first glance, I thought that was the finished product. :) I am sure that it looked equally fabulous after coming out of the oven.
LikeLike
I have done “gobble and then have realized I have not taken pictures”:).. A big reason to do it again!!!
Sowmya
Ongoing Event – What is with my Cuppa
Ongoing Event – HITS – Diabetic Friendly
LikeLike
Sounds very interesting. The unbaked dough itself looks so interesting.Waiting for the baked ones..
LikeLike
ROFL!! It is so like me :) Looking at the before pictures I would hv pbly done the same :)
LikeLike
The unbaked bread itself looks amazing. Was waiting for the baked bread’s picture as I was scrolling down and realised very late that you ate it up. Very hilarious. Please make it again and upload the finished pictures so that we can have a virtual treat…
LikeLike
you are finding some real interesting recipes for baking, i know yeast is extremely addictive, i also get those spurts , this one looks very nice, please bake them again and take pictures this time
LikeLike
hahah, I agree with others, I almost scrolled up and down before reading your post, wanting to see how it looked after baking! This surely calls for another round of baking Rajani, better would have been if you do a demo for us..:)
LikeLike
Haha..my first instinct was to scroll down and see the final picture and only then realised that it was yet to come:-)…love the braid and i have baked some too:-)
LikeLike
Lovely one. Need to see the baked one even its half.
LikeLike
LOL I completely empathize, the toughest thing to do is to wait to take pictures when you are hungry :) This bread looks inviting just as it is, must have tasted pretty yum !!
LikeLike
Rajani what man!! This is not fair…u r baking this after the celebrations are over, pahle hota toh I would have caught you for a demo..please bake again n put step by step pics….n u seem to be on a real baking spree…loving it! Keep it up:)
LikeLike
waw… this looks so beautiful! I wish I could also see the baked ones:) I can totally understand as even I am in the same boat. Me too forget to take pics & will be in a hurry to hog:)
LikeLike
That looks so beautiful as is……would have loved to see the baked one too. Now, that gives you an excuse to bake this again, doesn’t it?
LikeLike
I dont bother to see that half eaten bread, am sure that those baked ones will look absolutely fantabulous too..Beautiful unbaked rose bread.
LikeLike
OMG – u r 2 funny!!! regardless, they look beautiful unbaked and I am sure were even more gorgeous once baked
LikeLike